Mon installation :
La version que je vise :
Les étapes :
# git clone https://github.com/luchina-gabriel/OSX-PROXMOX.git

# /bin/bash -c "$(curl -fsSL https://install.osx-proxmox.com)"

OSX-PROXMOX (Version 20231212T1850) - GABRIEL LUCHINA - https://osx-proxmox.com

Prerequisites have not yet been installed and configured on this HOST.

Running the prerequisites and at the end your HOST will be rebooted ...

... Successfully completed prerequisite process, your HOST will restart within 15s.

After rebooting, RUN: osx-setup
Le setup est bien fait :
Voici le résultat du test :
{
"benchmark_client": {
"client_version": "1.0b2"
},
"blender_version": {
"build_commit_date": "2018-03-22",
"build_commit_time": "14:10",
"build_date": "2018-03-22",
"build_hash": "f4dc9f9",
"build_time": "21:48:25",
"version": "2.79 (sub 0)"
},
"device_info": {
"compute_devices": [
"Intel Core i7-7820HQ CPU @ 2.90GHz"
],
"device_type": "CPU",
"num_cpu_threads": 8
},
"scenes": [
{
"name": "barbershop_interior",
"stats": {
"device_memory_usage": 2341.5,
"device_peak_memory": 2341.58,
"pipeline_render_time": 2946.86,
"render_time_no_sync": 2896.97,
"result": "OK",
"total_render_time": 2945.8
}
},
{
"name": "bmw27",
"stats": {
"device_memory_usage": 140.55,
"device_peak_memory": 140.56,
"pipeline_render_time": 580.22,
"render_time_no_sync": 574.657,
"result": "OK",
"total_render_time": 578.833
}
},
{
"name": "classroom",
"stats": {
"device_memory_usage": 295.71,
"device_peak_memory": 295.77,
"pipeline_render_time": 1909.69,
"render_time_no_sync": 1907.64,
"result": "OK",
"total_render_time": 1908.78
}
},
{
"name": "fishy_cat",
"stats": {
"device_memory_usage": 465.3,
"device_peak_memory": 466.65,
"pipeline_render_time": 860.63,
"render_time_no_sync": 849.711,
"result": "OK",
"total_render_time": 859.406
}
},
{
"name": "koro",
"stats": {
"device_memory_usage": 449.47,
"device_peak_memory": 473.3,
"pipeline_render_time": 1205.35,
"render_time_no_sync": 1192.2,
"result": "OK",
"total_render_time": 1205.08
}
},
{
"name": "pavillon_barcelona",
"stats": {
"device_memory_usage": 150.43,
"device_peak_memory": 150.44,
"pipeline_render_time": 1482.2,
"render_time_no_sync": 1478.99,
"result": "OK",
"total_render_time": 1479.97
}
}
],
"system_info": {
"bitness": "64bit",
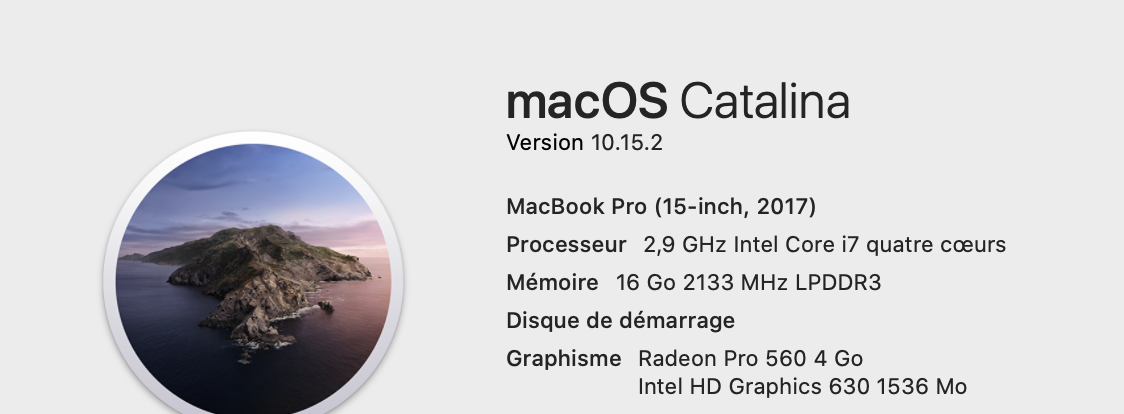
"cpu_brand": "Intel(R) Core(TM) i7-7820HQ CPU @ 2.90GHz",
"devices": [
{
"name": "Intel Core i7-7820HQ CPU @ 2.90GHz",
"type": "CPU"
},
{
"name": "Intel HD Graphics 630",
"type": "OPENCL"
},
{
"name": "AMD Radeon Pro 560 Compute Engine",
"type": "OPENCL"
}
],
"machine": "x86_64",
"num_cpu_cores": 4,
"num_cpu_sockets": 1,
"num_cpu_threads": 8,
"system": "Darwin"
},
"timestamp": "2021-06-11T12:48:21.823185+00:00"
}Mon précédent test : https://www.cyber-neurones.org/2019/12/macos-macbook-pro-15-inch-2017-benchmark-avec-blender/ . Il y a une perte de performance …. Misère.
Suite à l’update en version Ubuntu 20.04 j’ai essayé de faire une nouvelle tentative ! Ma précédente tentative (11/03/2020 ) : https://www.cyber-neurones.org/2020/03/script-de-creation-automatiquement-dune-machine-virtuelle-de-macos-pour-virtualbox-echec-pour-moi/
Mes versions :
$ vboxmanage --version
6.1.16_Ubuntur140961
$ cat /etc/os-release
NAME="Ubuntu"
VERSION="20.04.1 LTS (Focal Fossa)"
ID=ubuntu
ID_LIKE=debian
PRETTY_NAME="Ubuntu 20.04.1 LTS"
VERSION_ID="20.04"
HOME_URL="https://www.ubuntu.com/"
SUPPORT_URL="https://help.ubuntu.com/"
BUG_REPORT_URL="https://bugs.launchpad.net/ubuntu/"
PRIVACY_POLICY_URL="https://www.ubuntu.com/legal/terms-and-policies/privacy-policy"
VERSION_CODENAME=focal
UBUNTU_CODENAME=focal
Il faut mettre le pack extension pour que cela fonctionne : [https://download.virtualbox.org/virtualbox/6.1.16/ .](https://download.virtualbox.org/virtualbox/6.1.16/ .)
Lancement du script :
$ ./macos-guest-virtualbox.sh
Waiting for the VirtualBox GUI to shut off.
Please wait
Catalina_BaseSystem.vdi successfully detached from
the virtual machine and released from VirtualBox Manager.

stage: create_target_virtual_disk
Creating target system virtual disk image for "macOS"
0%...10%...20%...30%...40%...50%...60%...70%...80%...90%...100%
Medium created. UUID: 10868994-4a31-4af9-bc2d-0130f283870d

stage: populate_macos_target_disk

Creating VirtualBox 6 virtual ISO containing macOS Terminal scripts
for partitioning and populating the target virtual disk.

The VM will boot from the populated installer base system virtual disk.

Attempting automated recognition of virtual machine graphical user interface.
Please wait
The second open Terminal in the virtual machine copies EFI and NVRAM files
to the target EFI system partition when the installer finishes preparing.

After the installer finishes preparing and the EFI and NVRAM files are copied,
macOS will install and boot up when booting the target disk.

Please wait

For further information, such as applying EFI and NVRAM variables to enable
iMessage connectivity, see the documentation with the following command:

./macos-guest-virtualbox.sh documentation | less -R

That's it! Enjoy your virtual machine.

stage: prompt_delete_temporary_files
Temporary files may be deleted when the virtual machine is powered off
and without a suspended state by executing the following command at the script's
working directory:

./macos-guest-virtualbox.sh prompt_delete_temporary_files

Push-button installer of macOS on VirtualBox

This script installs only open-source software and unmodified Apple binaries,
and requires about 50GB of available storage, of which 25GB are for temporary
installation files that may be deleted when the script is finished.

The script interacts with the virtual machine twice, please do not interact
with the virtual machine manually before the script is finished.

Documentation about optional configuration, iCloud and iMessage connectivity,
resuming the script by stages, and other topics can be viewed with the
following command:

  ./macos-guest-virtualbox.sh documentation | less -R

Press enter to review the script configuration

vm_name="macOS"
macOS_release_name="Catalina"    # install "HighSierra" "Mojave" "Catalina"
storage_size=80000               # VM disk image size in MB. minimum 22000
storage_format="vdi"             # VM disk image file format, "vdi" or "vmdk"
cpu_count=2                      # VM CPU cores, minimum 2
memory_size=4096                 # VM RAM in MB, minimum 2048
gpu_vram=128                     # VM video RAM in MB, minimum 34, maximum 128
resolution="1280x800"            # VM display resolution

These values may be customized as described in the documentation.

Press enter to continue, CTRL-C to exit

Catalina selected to be downloaded and installed

stage: prompt_delete_existing_vm

stage: create_vm

stage: check_default_virtual_machine

Checking that VirtualBox starts the virtual machine without errors.

Checking that VirtualBox uses hardware-supported virtualization.

stage: prepare_macos_installation_files

Downloading Apple macOS Catalina software update catalog
Catalina_sucatalog                       100%[===============================================================================>]   6,52M  1,82MB/s    in 3,6s
Trying to find macOS Catalina InstallAssistant download URL
Catalina_sucatalog_00_InstallAssistantAu 100%[===============================================================================>]  40,05K  --.-KB/s    in 0,03s
Found download URL: http://swcdn.apple.com/content/downloads/26/37/001-68446/r1dbqtmf3mtpikjnd04cq31p4jk91dceh8/

Downloading macOS installation files from swcdn.apple.com
Catalina_BaseSystem.chunklist            100%[===============================================================================>]   1,97K  --.-KB/s    in 0s
Catalina_InstallInfo.plist               100%[===============================================================================>]   1,55K  --.-KB/s    in 0s
Catalina_AppleDiagnostics.dmg            100%[===============================================================================>]   3,00M  1,64MB/s    in 1,8s
Catalina_AppleDiagnostics.chunklist      100%[===============================================================================>]     328  --.-KB/s    in 0s
Catalina_BaseSystem.dmg                  100%[===============================================================================>] 475,53M  1,09MB/s    in 5m 47s
Catalina_InstallESDDmg.pkg               100%[===============================================================================>]   7,21G  1,84MB/s    in 78m 9s

Splitting the several-GB InstallESDDmg.pkg into 1GB parts because
VirtualBox hasn't implemented UDF/HFS VISO support yet and macOS
doesn't support ISO 9660 Level 3 with files larger than 2GB.
creating file 'Catalina_InstallESD.part00'
creating file 'Catalina_InstallESD.part01'
creating file 'Catalina_InstallESD.part02'
creating file 'Catalina_InstallESD.part03'
creating file 'Catalina_InstallESD.part04'
creating file 'Catalina_InstallESD.part05'
creating file 'Catalina_InstallESD.part06'
creating file 'Catalina_InstallESD.part07'

Downloading open-source APFS EFI drivers used for VirtualBox 6.0 and 5.2
...even though VirtualBox version 6.1 or higher is detected.
AppleSupport-v2.0.4-RELEASE.zip          100%[===============================================================================>]  42,20K  --.-KB/s    in 0,1s
Archive:  AppleSupport-v2.0.4-RELEASE.zip
  inflating: ApfsDriverLoader.efi
  inflating: AppleImageLoader.efi
  inflating: AppleUiSupport.efi

stage: create_nvram_files

stage: create_macos_installation_files_viso
Creating EFI startup script

Creating VirtualBox 6 virtual ISO containing the
installation files from swcdn.apple.com

stage: configure_vm

stage: populate_basesystem_virtual_disk
Converting BaseSystem.dmg to BaseSystem.img

dmg2img v1.6.7 (c) vu1tur (to@vu1tur.eu.org)

Catalina_BaseSystem.dmg --> Catalina_BaseSystem.img

decompressing:
opening partition 0 ...             100.00%  ok
opening partition 1 ...             100.00%  ok
opening partition 2 ...             100.00%  ok
opening partition 3 ...             100.00%  ok
opening partition 4 ...             100.00%  ok
opening partition 5 ...             100.00%  ok
opening partition 6 ...             100.00%  ok
opening partition 7 ...             100.00%  ok

Archive successfully decompressed as Catalina_BaseSystem.img
Converting from raw image file="Catalina_BaseSystem.img" to file="Catalina_BaseSystem.vdi"...
Creating dynamic image with size 2138558464 bytes (2040MB)...

stage: create_bootable_installer_virtual_disk
Creating Catalina installation media virtual disk image.
0%...10%...20%...30%...40%...50%...60%...70%...80%...90%...100%
Medium created. UUID: 73d5bc4e-a63c-4ad0-b10e-897beb33428e

stage: populate_bootable_installer_virtual_disk

Creating VirtualBox 6 virtual ISO containing macOS Terminal script
for partitioning and populating the bootable installer virtual disk.

Starting virtual machine "macOS".
This should take a couple of minutes. If booting fails, exit the script by
pressing CTRL-C then see the documentation for information about applying
different CPU profiles in the section CPU profiles and CPUID settings.

Until the script completes, please do not manually interact with
the virtual machine.

Please press enter as directed.

Press enter when the Language window is ready.
Ensuite :
Voici ma liste :
J’ai donc testé le script suivant : https://github.com/myspaghetti/macos-guest-virtualbox : macos-guest-virtualbox . Le but du script est de faire une machine Virtuel sous Ubuntu. A noter que le déroulement du script est très long, je pense qu’il faut compter 4 heures.
Voici tous le process d’installation :
# wget -q https://www.virtualbox.org/download/oracle_vbox_2016.asc -O- | sudo apt-key add -

# wget -q https://www.virtualbox.org/download/oracle_vbox.asc -O- | sudo apt-key add -

# sudo add-apt-repository "deb http://download.virtualbox.org/virtualbox/debian bionic contrib"

# sudo apt update

# sudo apt install virtualbox-6.1 virtualbox-dkms

# sudo apt install libcanberra-gtk-module libcanberra-gtk3-module

# sudo apt-get install dmg2img
Il est impératif d’avoir une version de virtualbox > 6.1. Par défaut sur Ubuntu on a la version 5.0 …
Il suffit de faire la commande suivante pour s’en rendre compte :
$ sudo du -d 1 -h /private/var/folders/
22M /private/var/folders//gz
298M /private/var/folders//zz
0B /private/var/folders//v3
124G /private/var/folders//gy
21M /private/var/folders//f8
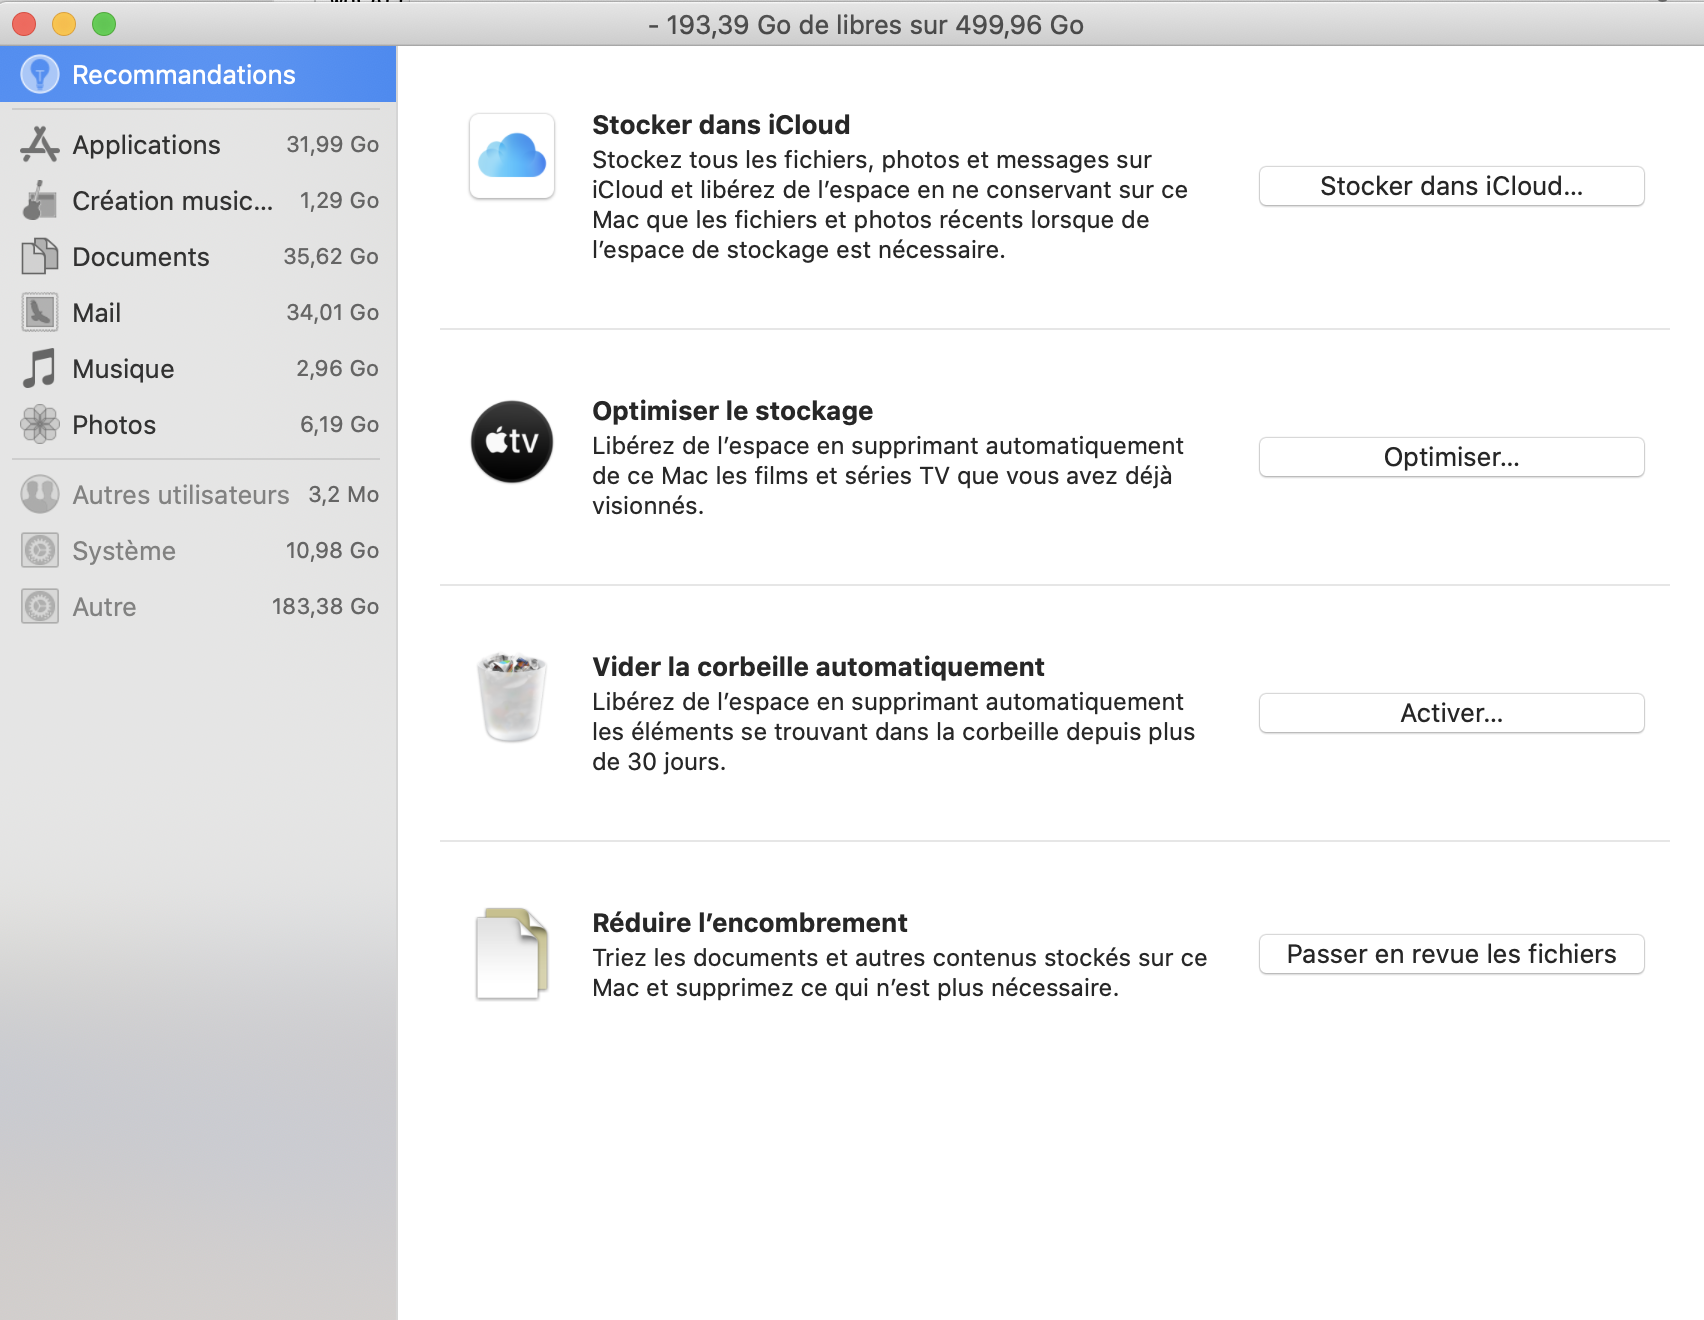
124G /private/var/folders/On se retrouve avec 124 Go de fichiers temporaires ?! Le diagnostic est le même avec : OmniDiskSweeper ( https://www.omnigroup.com/more/ )
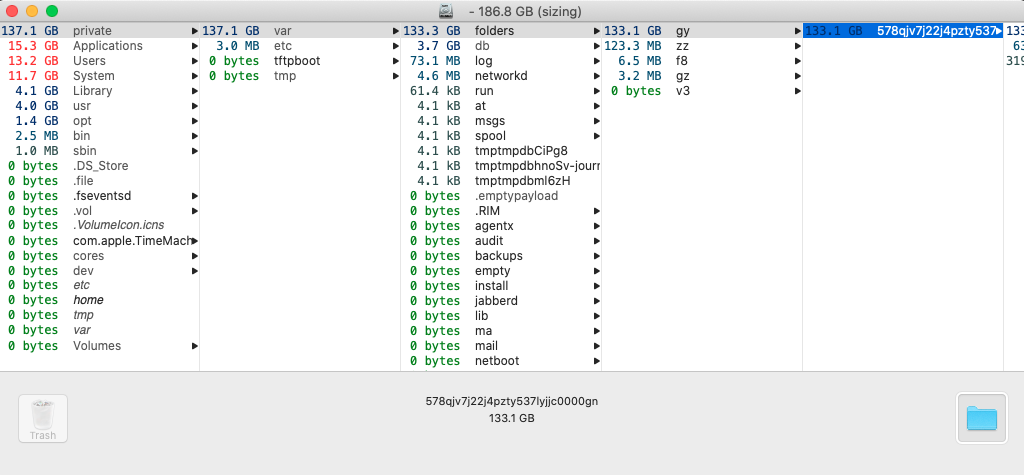
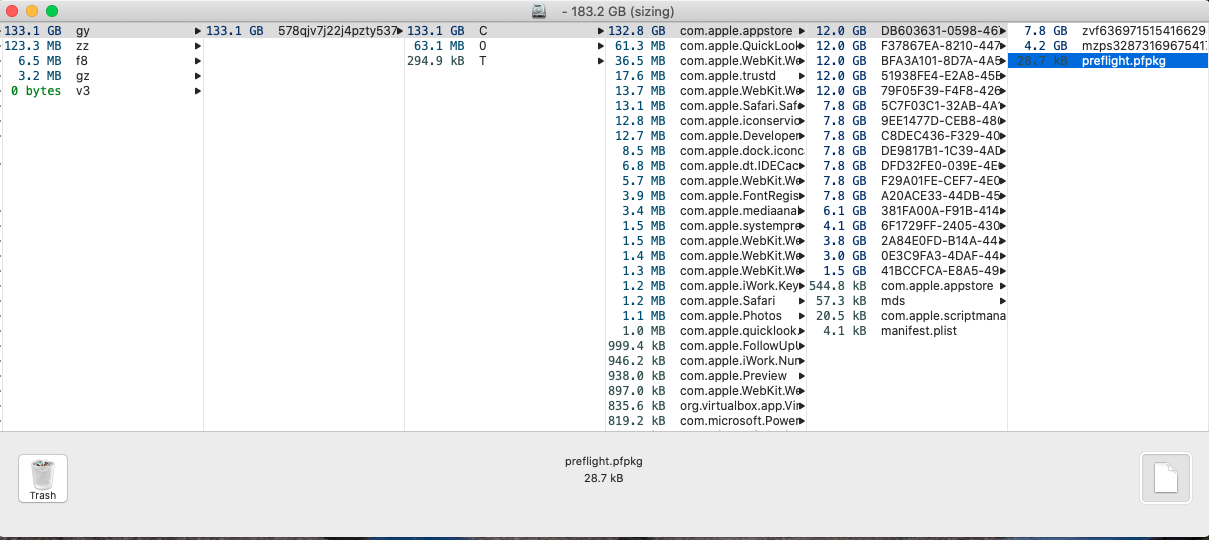
Pourquoi dans Gestion de Stockage on ne parle pas des fichiers temporaires de l’App Store ?
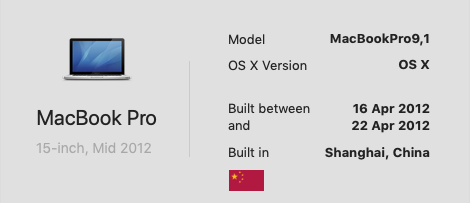
Ma version de Mac :
Petit bilan sur mon MacBook Pro (15 pouces, mi-2012) donc l’écran est H.S. Ce post est surtout pour réfléchir à haute voix sur mon prochain portable.
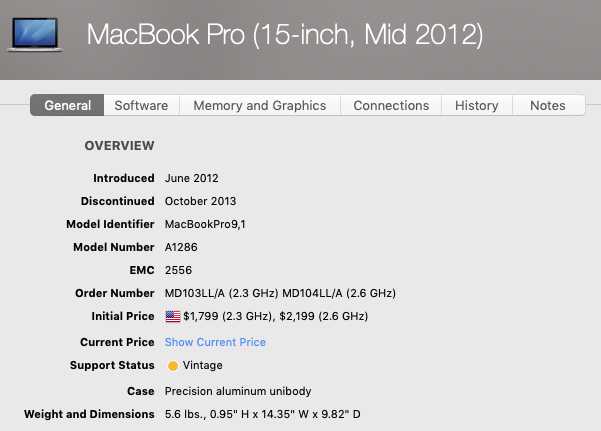
Voici le cout de mon MacBook Pro :
Pour la réparation de l’écran on me demande 900 Euros pour un neuf et 400 Euros pour un écran d’occasion. Mettre 400 Euros me semble risqué et 900 Euros dans un ordinateur qui a plus de 7 ans, c’est simplement pas sérieux.
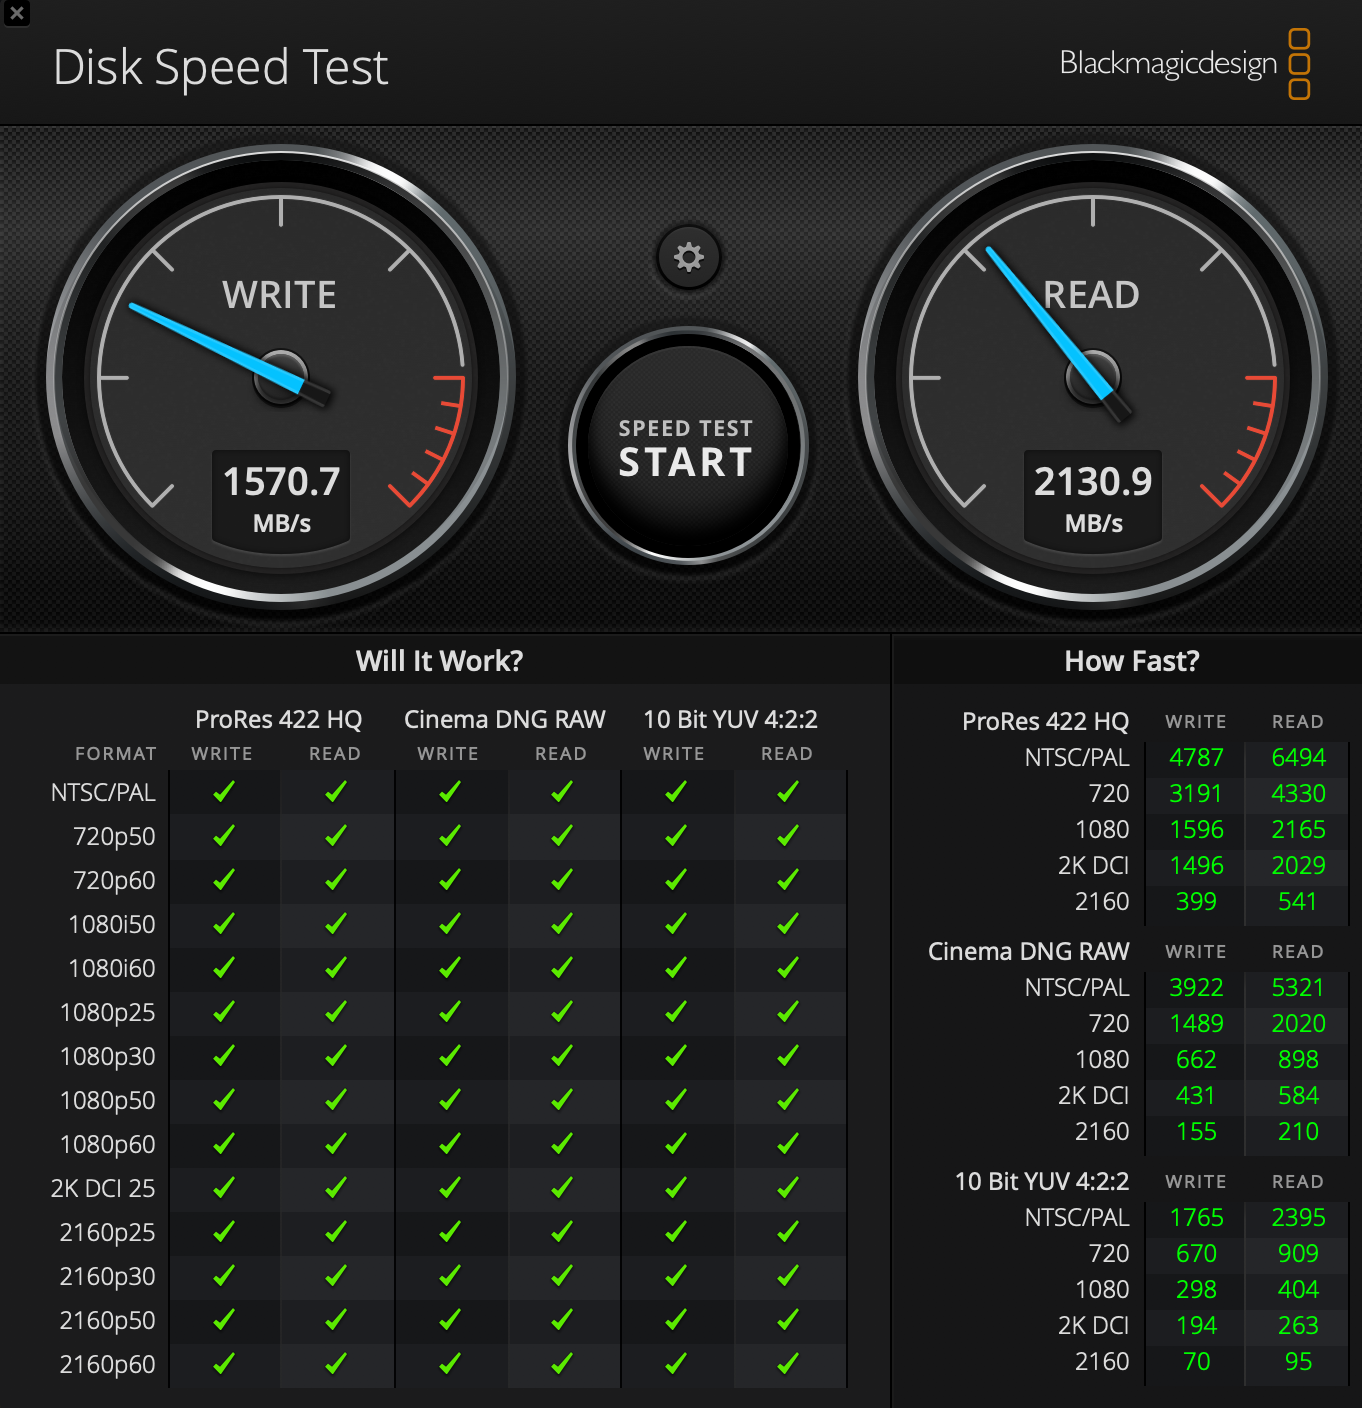
Test d’écriture/lecture des disques via Blackmagic design : https://apps.apple.com/fr/app/blackmagic-disk-speed-test/id425264550?mt=12
Disque SSD Local : Ecriture 1570 MB/s et Lecture 2130,9 MB/s .
 Disque Externe LaCie 5 To : Ecriture 110 MB/s et Lecture 109 MB/s .

Après une petite recherche sur google : https://discussions.apple.com/thread/7552801 .
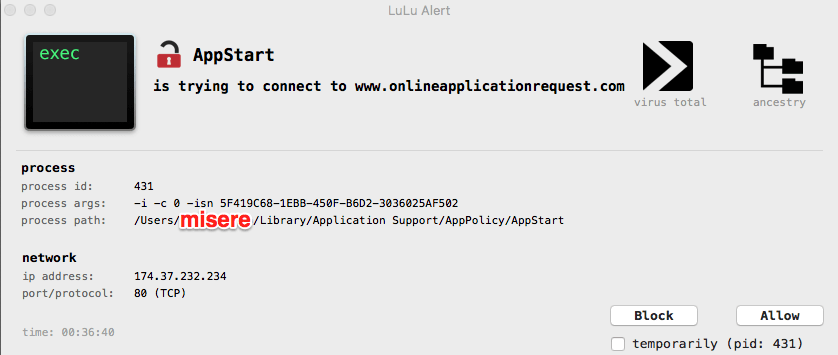
Je n’ai pas réussi à trouver quel était le fichier de configuration avec le nom de domaine dans les fichier .plist de Library.
Normalement je devrait avoir une fichier : ~/Library/LaunchAgents/com.onlineapplicationrequest.* … Peut-être que Lulu a supprimé le fichier.
A suivre.
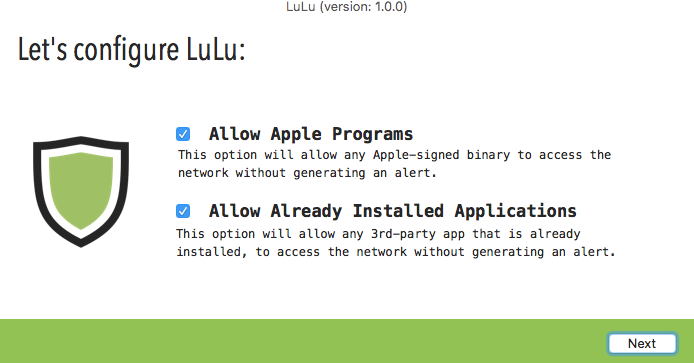
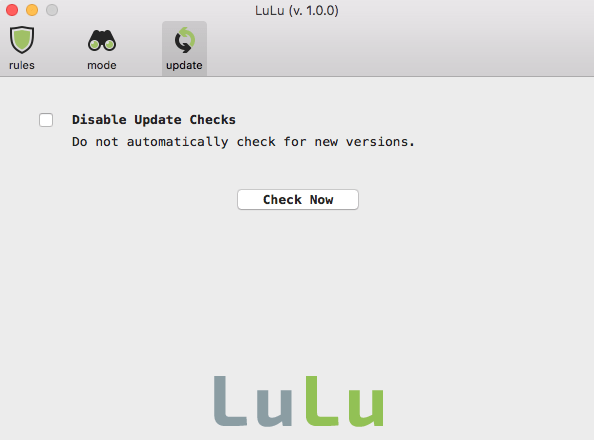
Je vous conseille Lulu : https://objective-see.com/products/lulu.html .
Pour plus d’information : https://www.macg.co/logiciels/2018/09/des-utilitaires-gratuits-pour-renforcer-la-securite-de-votre-mac-103534 :
Le chercheur en sécurité Patrick Wardle a récemment finalisé LuLu, un utilitaire qui permet de contrôler les connexions sortantes de votre Mac. À chaque fois qu’une nouvelle app veut se connecter à un serveur distant, LuLu vous demande de valider la connexion. Si la connexion est suspecte, vous pouvez l’interdire.
Les étapes de l’installation :

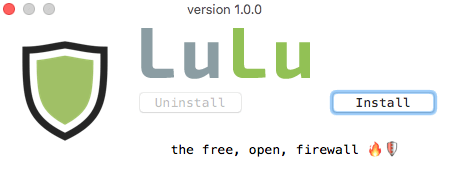
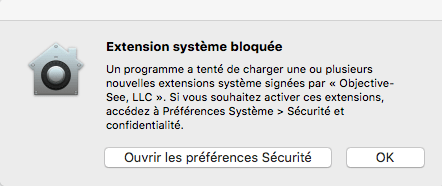
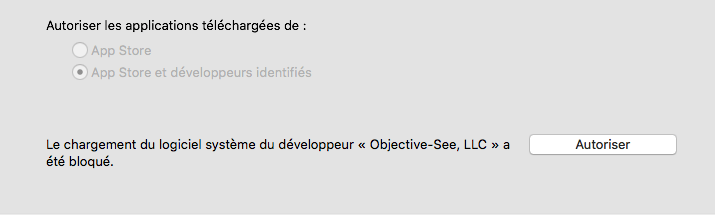
Après le lancement :
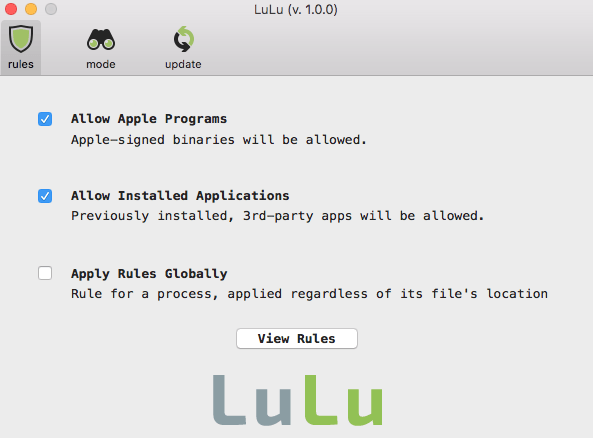
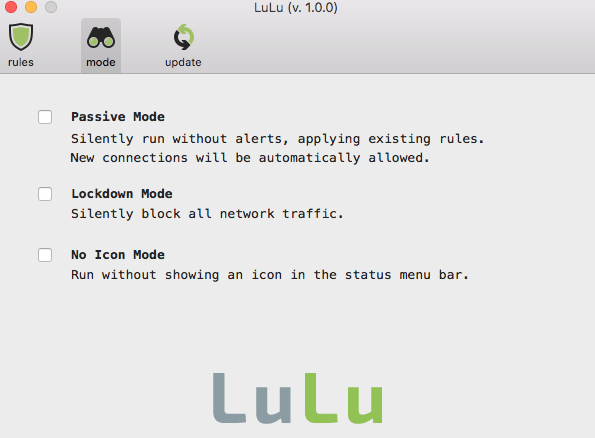
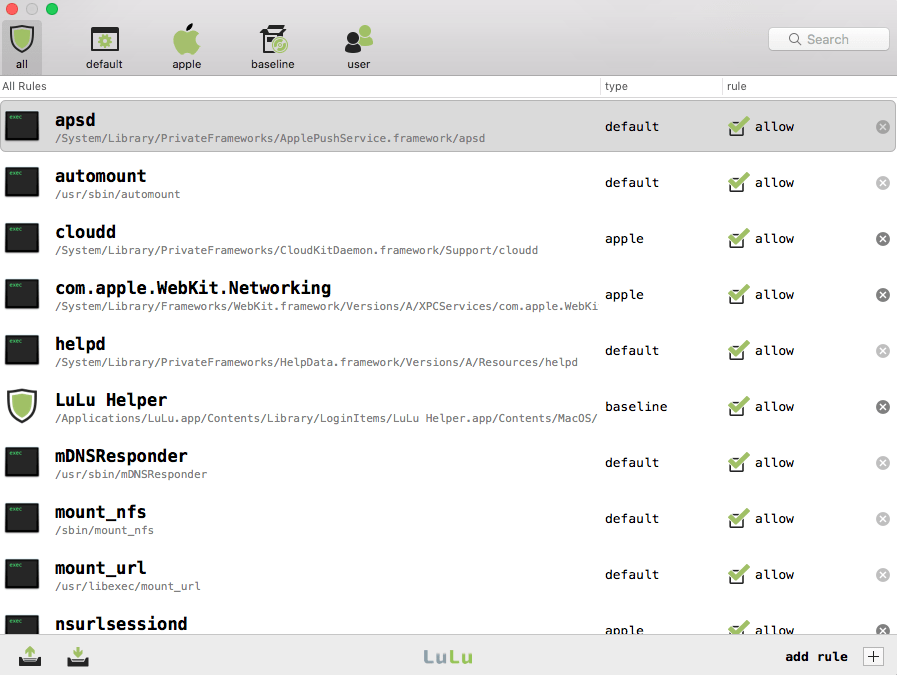
En test … les premiers pris par la patrouille :